

This is Snail Motion. In this blog post, we’ll show you How to add adjustment layer in premiere pro, which is a powerful software for editing videos that make it easy to improve your projects. Whether you’ve been editing for a long time or are just starting out, learning about adjustment levels can help you take your skills to the next level. Before we get into the process, be sure to check out our other helpful tips on the different features of Premiere Pro:
Now, let’s dive into the main topic How to add adjustment layer in premiere pro:
Table of Contents
What are Adjustment Layers?
In Premiere Pro, an adjustment layer is a special kind of layer that lets you add effects, change colors, and make other changes to more than one clip below it. You can add effects to an adjustment layer instead of adding them to each clip separately. This will save you time and effort. Adjustment layers work like a non-destructive overlay that changes all the clips below it but doesn’t change the source clips.
Adding Adjustment Layers: Step-by-Step Guide
- First, make sure you’re using the most latest version of Premiere Pro. If you’re not sure how to update or need to downgrade your project file to an older version, check out our guide on How to Downgrade a Premiere Pro Project.
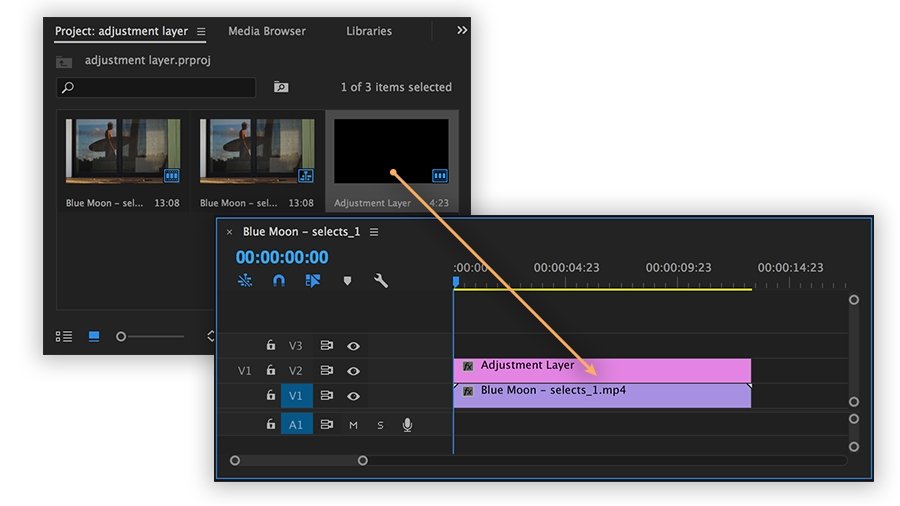
- Open the project you want to work on in Premiere Pro and go to the “Project” panel. Right-click anywhere in the panel, and from the menu that appears, choose “New Item” > “Adjustment Layer.”
- You’ll see a text box that lets you change the settings for the adjustment layer. You can give it a name and choose which settings in the series it should match.
- Once you’ve made the edit layer, drag and drop it on top of the clips you want to change. Remember that all the clips below this layer will now be affected by the effects that have been added.
- Go to the “Effects” panel to add effects to the change layer. You can try out different effects here, such as color grading, sharpness, blurring, and more. Just drag the effect you want onto the change layer, and all the clips below will get that effect.
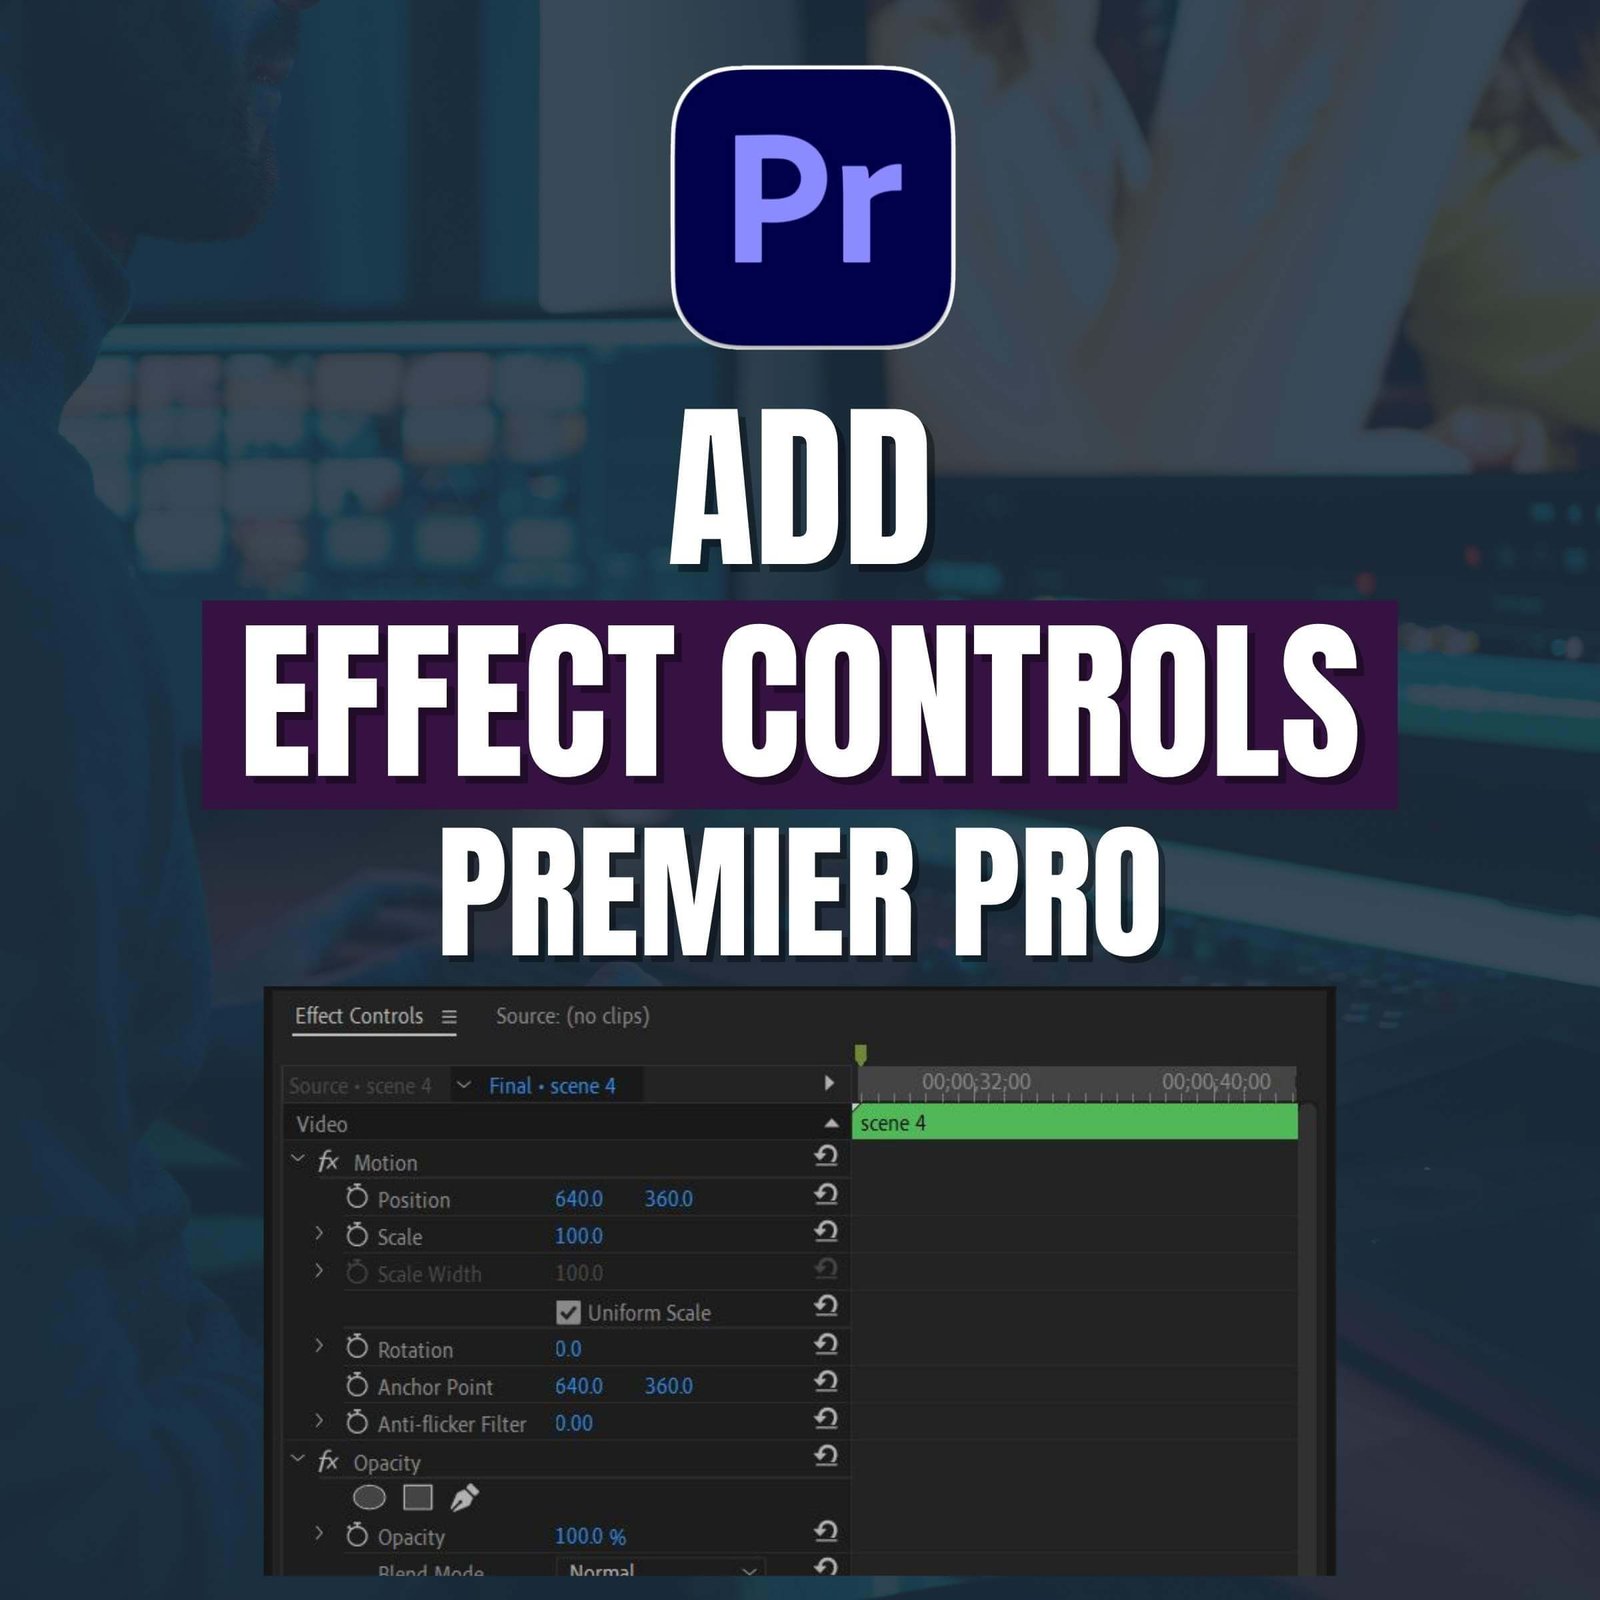
- Select the adjustment layer on the timeline and then go to the “Effect Controls” panel to make small changes to the effects. From here, you can change the settings for the look to suit your needs.
Conclusion:
In conclusion, any video editor must know how to apply adjustment layers in Premiere Pro. You can quickly apply effects and edits to several clips at once, which will save you time when editing. After getting the hang of adjustment layers, you might want to investigate other Premiere Pro creative tools, such as masking, to add eye-catching visual effects.
We sincerely hope that this tutorial has helped you comprehend how to add adjustment layers in Premiere Pro. For more fascinating video editing tutorials and advice, keep checking back at Snail Motion! Glad editing!

[…] Simply use the adjustment layer. Here is a complete guide on how to use the adjustment layer to make changes to all layers. […]