
This is Snail Motion. In this blog post, we’ll talk about How to move anchor point in After Effects, a skill that all users should know. In motion graphics and animation, the anchor point is a key part because it sets the point around which an object moves or changes size. If you can master this method, your animation will reach a whole new level of creativity and accuracy. So, let’s get started and learn how to move the anchor point in After Effects!
Table of Contents
1. Understanding the Importance of the Anchor Point
It is crucial to understand the significance of the anchor point in After Effects before beginning the process of modifying it. The anchor point is the point around which any layer or object can be moved or altered. It can also be referred to as the starting point. This determines the point around which the layer moves, rotates, or resizes itself. You can make your animations and changes more fluid and dynamic if you move the anchor point in a strategic way.
2. Moving the Anchor Point
To move the anchor point in After Effects, just follow these easy steps:
1: Select the layer you want to change in the composition box.
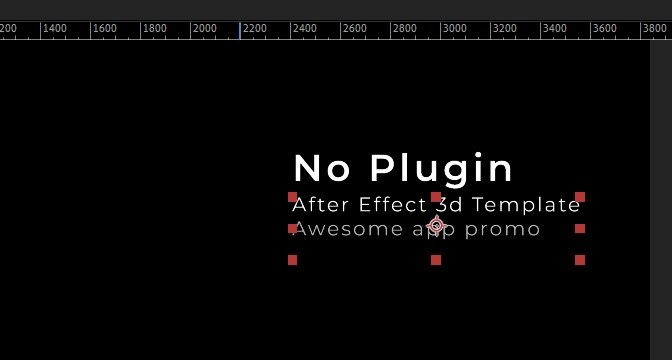
2: Find the anchor point property, which is represented by a small crosshair icon, in the layer’s transform settings.
3: Click and drag the anchor point to its new location. You can also use the arrow keys to make fine changes.
Step 4: Save your changes, and done! You have successfully changed the anchor point.
Creativity Tip: Incorporating Anchor Point Animation
Now that you are familiar with the process of moving the anchor point, let’s have a look at some innovative applications of anchor point motion that you may utilize in your projects. You are not need to maintain the anchor point still throughout the entirety of the motion; rather, you are free to move it in order to create captivating effects.
Topic 1: The Illusion of Pivoting
Through the use of animation on the anchor point, you may provide the impression that a character is rotating around a fixed point. This technique is fantastic for developing engaging animations of characters, and it also has the potential to infuse your drawings with a bit more vitality. Imagine, for instance, a swinging pendulum or a bouncing ball, both of which have an anchor point that shifts subtly but noticeably so that the movement appears to be more natural.
Topic 2: Unconventional Transitions
Try moving the anchor point when going from one scene or part to another. By moving the anchor point smoothly, you can make unexpected changes that will keep your audience’s attention. Try combining this method with the “How to Create a Wipe Transition in After Effects” lesson for even better results.
Conclusion:
Congratulations! You now know everything you need to know about how to move the anchor point in After Effects. This simple but powerful method will definitely make your motion graphics projects better and give you a lot of creative freedom. Don’t forget to read our other blog posts about Snail Motion, like “How to Add Adjustment Layer in After Effects” and “How to Make Precomp in After Effects” which will help you build on what you’ve learned here. Explore the “Animate Objects like a Pro with Motion Tools” blog post and free AE tool to take your animations to the next level.
With practice and a little bit of creativity, you’ll be well on your way to learning After Effects and making stunning motion graphics that will leave your audience in awe. Happy creating!


Leave A Comment