How to Add keyframe in After Effects by snailmotoin

How to Add keyframe in After Effects

Mastering keyframes is the key to unlocking the full potential of animation in After Effects. With these important markers, you can control how your products move, change, and have effects. In this detailed guide, we’ll look at How to Add keyframe in After Effects , as well as other ideas that will help you become a better animator.

How to Add keyframe in After Effects by snail motion

Adding a Keyframe Key:

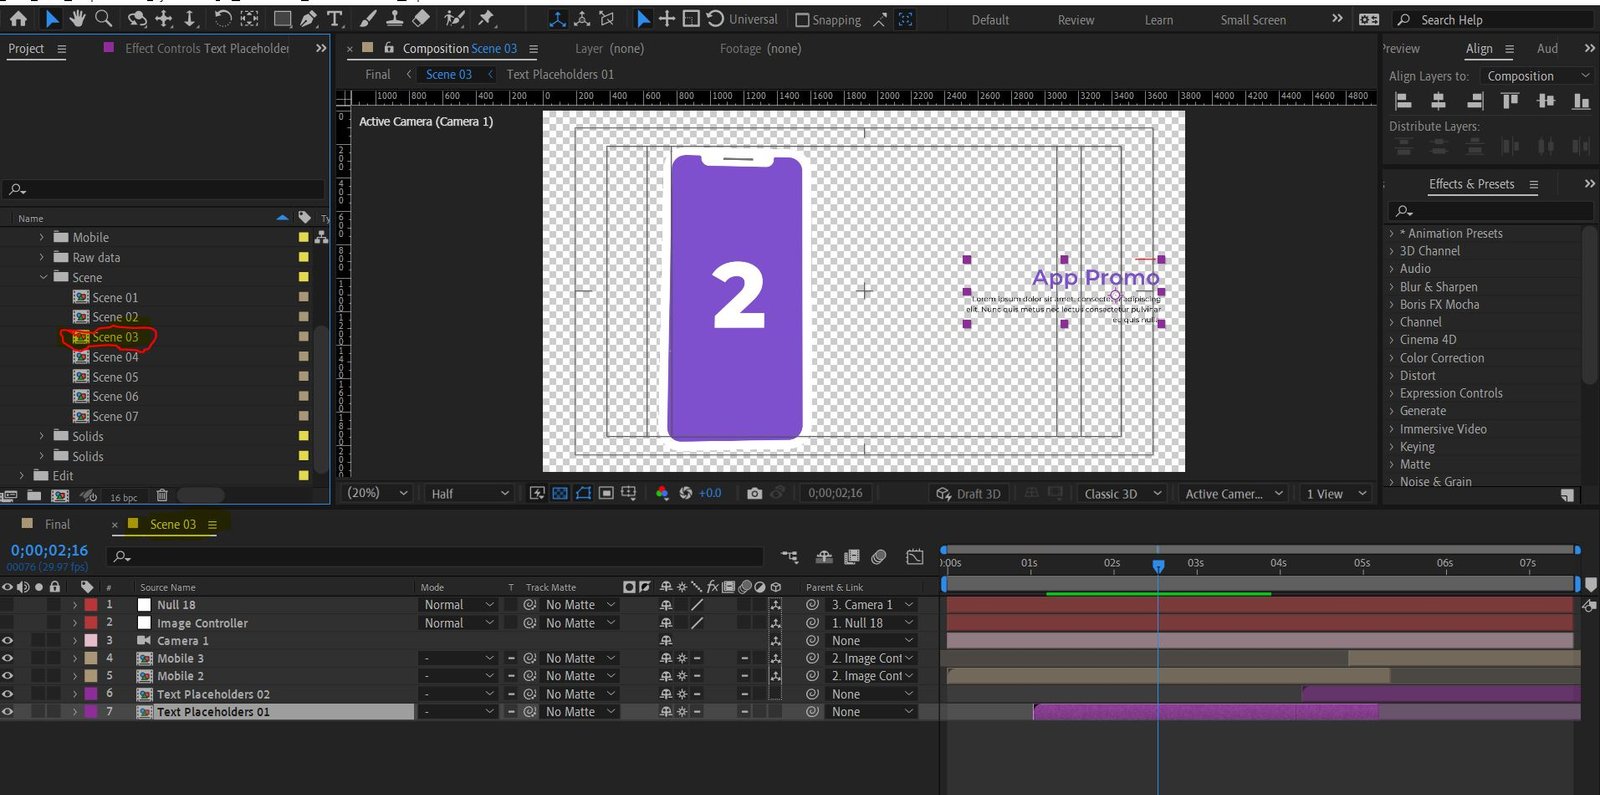
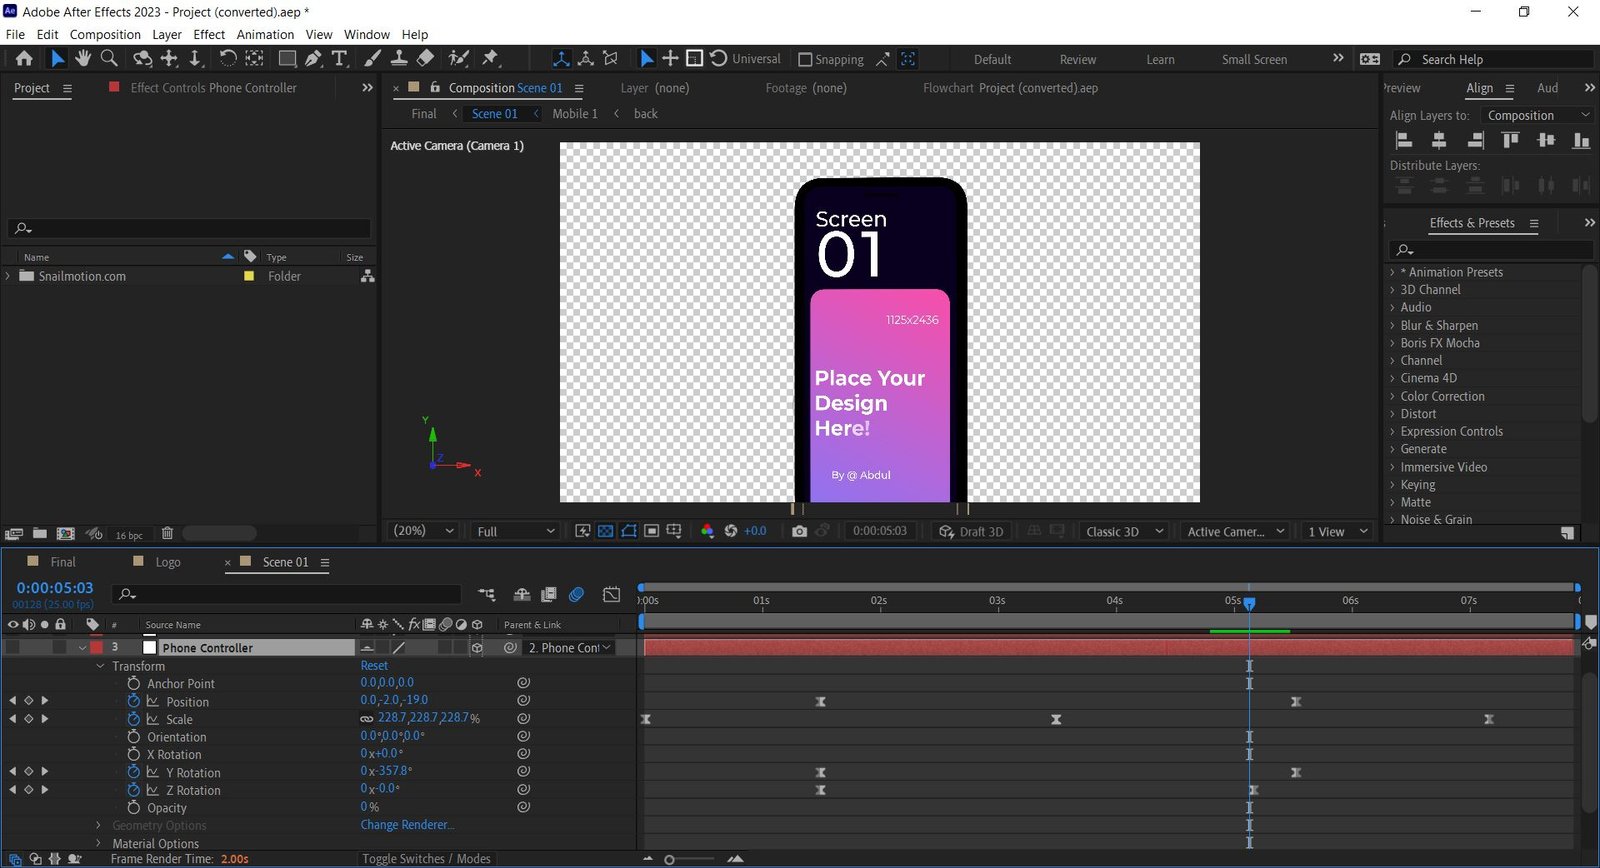
Adding a keyframe key will let you make animations that change over time. The first keyframe is set when you find the property you want to animate and click the stopwatch icon next to it in the timeline box. This one act sets the stage for the interesting animation that comes next.

Adding Keyframes to Clips:

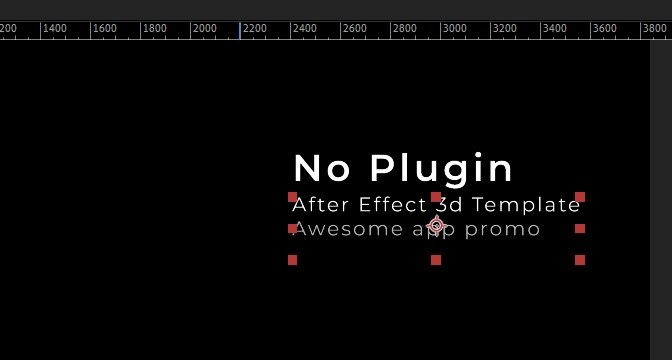
Adding life to your clips with keyframes is easy and deep at the same time. As you move around the timeline and change the characteristics of your element, new keyframes appear on their own. It’s a way for the timeline to keep track of your artistic journey.

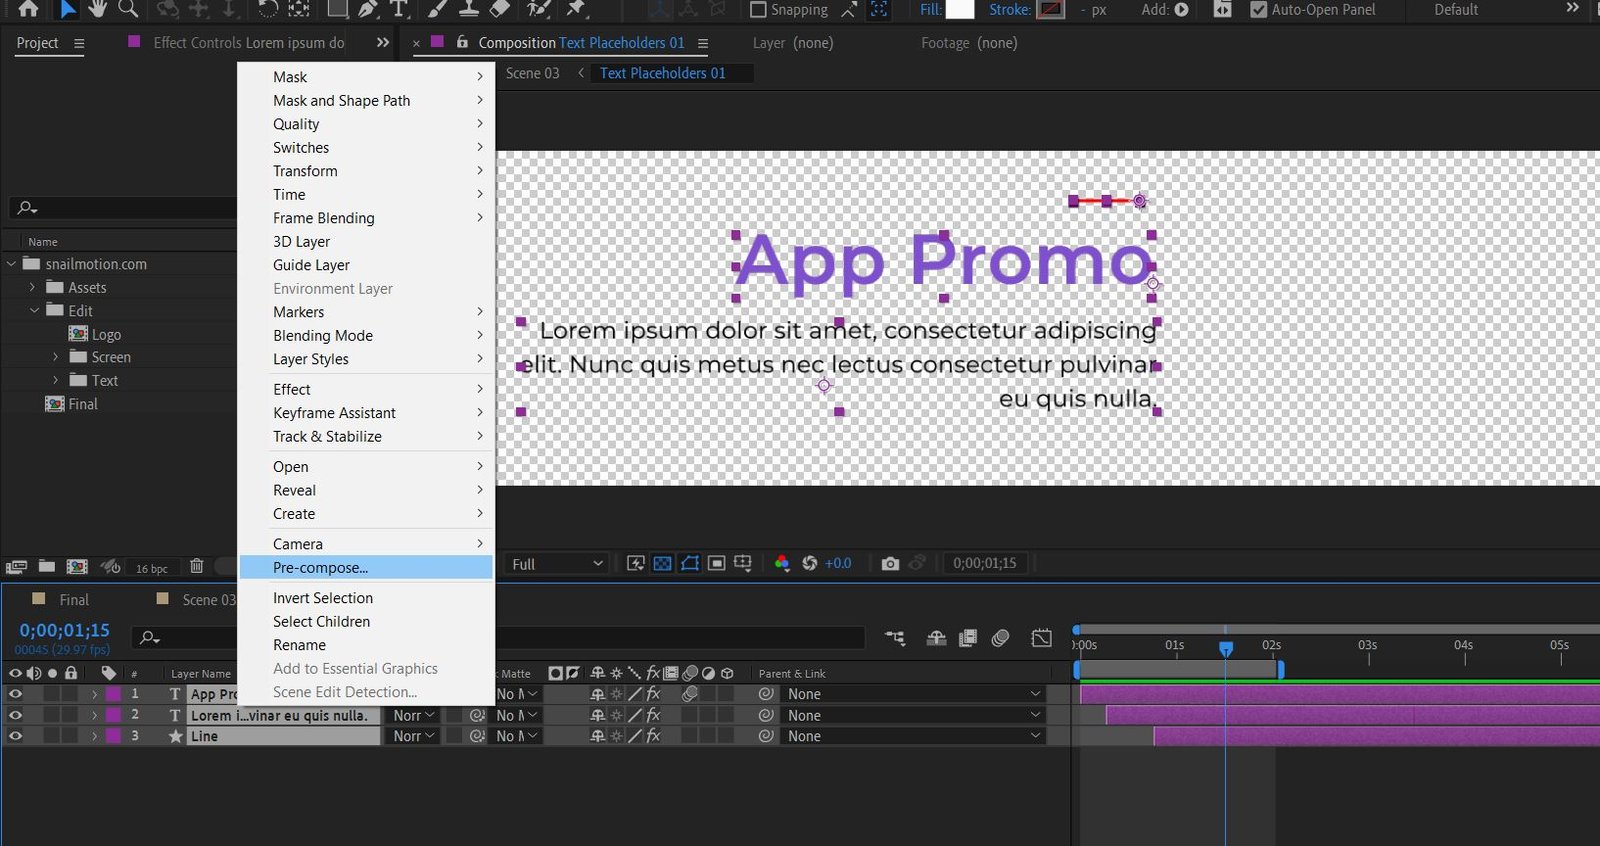
Adding Keyframes to the Timeline:

Think of your timeline as a blank canvas where animation can be made. To add keyframes, right-click on the object you want to animate and choose “Keyframe Assistant.” From the drop-down menu, choose “Add,” and your timeline will start to grow with possibilities.

Utilizing the Potential of Keyframes:

Mastering keyframes involves more than simply adding markers; it requires a comprehension of their impact. Varying the timing between keyframes imparts a natural cadence to your animation, while easing options such as “Easy Ease” add elegance to accelerations and decelerations. Don’t be afraid to experiment with various combinations of properties and keyframes in order to create intricate, captivating animations.

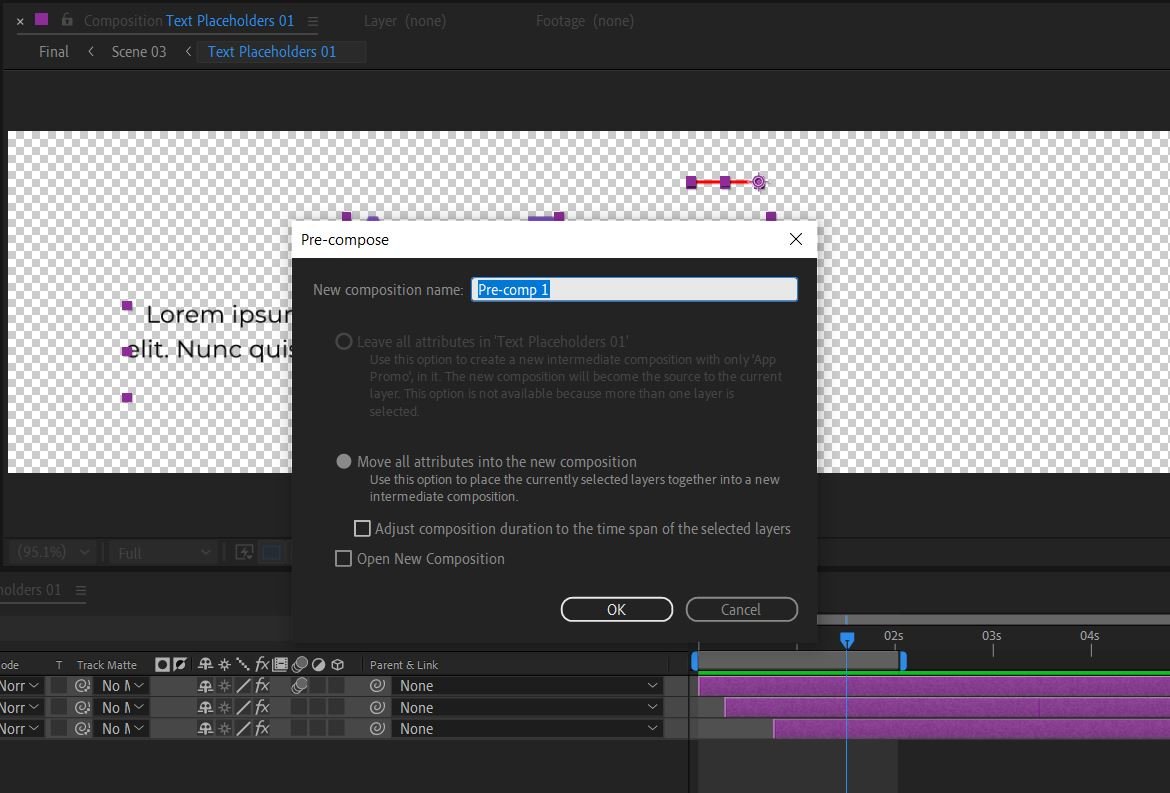
Enhancing Your Animation Toolkit:

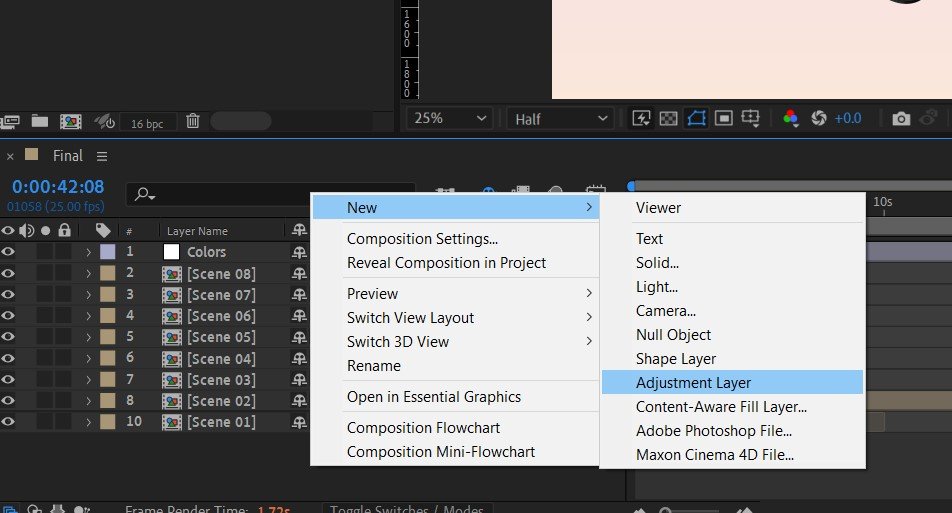
Snail Motion provides helpful materials that mesh well with your ongoing discovery of the animation world. Find out how to use Adjustment Layers to give your work that extra polish it needs. Create Precomps to improve project planning and management. With Mastering Time Remap, you can control time and create amazing results. Crafting Wipe Transitions will give your scene changes more style and class.

Conclusion:

Congratulations! You’ve started a trip to learn How to Add keyframe in After Effects to give life to things that aren’t moving. By knowing how to add keyframes and using them in a creative way, you’ve given yourself the power to make cartoons that stand out. As you continue on this exciting journey, know that Snail Motion is with you every step of the way to give you ideas, advice, and inspiration. Take the time to learn about keyframes, and you’ll see how your cartoons change into interesting stories. Have fun drawing!

What is Precomposing in after effects by snail motion

What is Precomposing in after effects

Welcome to Snail Motion, where we explore the complicated world of After Effects to figure out what animation is all about. In this article, we’ll talk about What is Precomposing in after effects, a basic technique that can help your motion graphics reach new heights. No matter how experienced you are, learning what pre composing is and how to use it can change the way you approach jobs.

What is Precomposing in after effects

At its core, precomposing in After Effects means combining multiple layers into a single composition, or “precomp.” With this method, you can treat a group of layers as a single unit, which makes it easier to apply effects, make changes, and make adjustments. Think of it as putting your parts in a box that you can move around without affecting the rest of your composition. Precomposing is the key to staying organized and getting things done quickly in After Effects.

What is Precomposing in after effects by snail motion

Benefits of Precomposing:

Using precomposing has a lot of benefits that can change the way you work with animation:

  1. Simplified Complex Scenes: Precomposing enables you to concentrate on the larger picture when working with complex animations. Working within the constraints of a precomp rather than navigating a sea of individual layers might speed up your creative process.
  2. Effortless Effects Management: With a pre composition, it’s easy to add effects to multiple levels at once. You can try out different effects, tweak them, and change them without messing up your main design.
  3. Optimized Performance: By separating certain parts, precomps improve speed. After Effects generates each pre-composition separately, which makes playback smoother and speeds up rendering.

Mastering the Precomposing Process:

Let’s explore the After Effects process for precomposing a clip:

  1. Select your Layers: Within a pre-composition, highlight the layers you wish to group together.
  2. Right-Click and Precompose: Select “Pre-compose” by performing a right-click on the chosen layers.
  3. Define Settings: Give your precomposition a name and adjust the settings to suit the requirements of your project.
  4. Confirm and Create: Create your precomposition by clicking “OK”.

Taking Advantage of a Faster Way:

Using a keyboard shortcut for pre composing will increase your productivity: Ctrl+Shift+C (Windows) or Command+Shift+C (Mac).

Boost Your After Effects Toolkit:

With these specially chosen articles from Snail Motion, you may improve your animation skills even more:

  1. How to Add Adjustment Layers in After Effects: Discover the power of adjustment layers for faster editing and global effects.
  2. How to Make Precomps in After Effects: Explore pre composing methods in more depth and turn your compositions into well-organized works of art.

Conclusion:

As you start to learn After Effects, keep in mind that understanding “what is pre composing in After Effects” is like unlocking a treasure chest full of artistic options. With the help of Snail Motion, you may improve your animation skills and learn this crucial technique. When you use pre writing, your work will be more organized, efficient, and beautiful to look at. Here on Snail Motion is where your artistic journey begins.

How to reset after effects preferences by snail motion

How to reset after effects preferences

This is Snail Motion. As a person who uses Adobe After Effects, you may have run into problems or bugs while working on creative projects. Don’t worry, because we’ll show you ‘How to reset after effects preferences’ settings in this blog post. This simple but powerful method can help you figure out what’s wrong with your software and fix it, so you can get back to making stunning animations and visual effects.

Why Resetting After Effects Preferences is a Game-Changer

When the settings for After Effects get lost or set up wrong, it can lead to annoying problems like crashes, slow performance, or strange behavior. By resetting the preferences, you are giving the software a fresh start, getting rid of any difficult settings that might be causing the problems. It’s like hitting the “reset” button on your creativity, which means that your animation projects will go more smoothly.

Step-by-Step Guide to Reset After Effects Preferences

  1. Close After Effects: Before we start, make sure Adobe After Effects is stopped so that we can continue with the reset of preferences.
  2. Find the folder called “Preferences”: Now, let’s go to your computer and look for the “Preferences” folder. Your working system will tell you how to get to this folder:

    Users of Windows should go to C:\Users<YourUsername>\AppData\Roaming\Adobe\After Effects\
    For users of macOS, go to:/Users/<YourUsername>/Library/Preferences/Adobe/After Effects/

  3. Backup Preferences: Make a copy of the current “Preferences” folder and put it somewhere safe as a safety measure.
  4. Delete the Preferences Folder: Once you’ve made a backup, you can get rid of the original “Preferences” folder from where it was.
  5. Restart After Effects: Open After Effects again after deleting the folder. The software will make a new folder called “Preferences” with the choices that come with it.
  6. Customize Your Settings: After After Effects has started up again, you can change your settings to fit your needs and workflow.

Topics to Enhance Your After Effects Skills:

1. How to Add Adjustment Layer in After Effects:

Explore the world of adjustment layers and learn how they can help you make your work easier by letting you apply effects widely and make creative changes quickly. Link to the Blog Post

2. How to Make Precomps in After Effects:

Learn how to use precomposing to get your project organized, make complicated animations, and save time. Mastering precomps is a sure way to take your After Effects skills to the next level. Link to the Blog Post

Conclusion:

Learning how to reset After Effects’ options might help you avoid irritating technical issues and improve your artistic experience. We hope this blog post taught you something and helped you. Now that you know this, don’t forget to learn more about the other things we talked about above. They help you maximize Adobe After Effects and bring your ideas to life.

Remember that imagination is limitless, and with the correct tools and knowledge, your animations and visual effects can soar.Happy creating!

How to move anchor point in After Effects snail motion

How to move anchor point in After Effects

This is Snail Motion. In this blog post, we’ll talk about How to move anchor point in After Effects, a skill that all users should know. In motion graphics and animation, the anchor point is a key part because it sets the point around which an object moves or changes size. If you can master this method, your animation will reach a whole new level of creativity and accuracy. So, let’s get started and learn how to move the anchor point in After Effects!

1. Understanding the Importance of the Anchor Point

It is crucial to understand the significance of the anchor point in After Effects before beginning the process of modifying it. The anchor point is the point around which any layer or object can be moved or altered. It can also be referred to as the starting point. This determines the point around which the layer moves, rotates, or resizes itself. You can make your animations and changes more fluid and dynamic if you move the anchor point in a strategic way.

How to move anchor point in After Effects snail motion

2. Moving the Anchor Point

To move the anchor point in After Effects, just follow these easy steps:

1: Select the layer you want to change in the composition box.

2: Find the anchor point property, which is represented by a small crosshair icon, in the layer’s transform settings.

3: Click and drag the anchor point to its new location. You can also use the arrow keys to make fine changes.

Step 4: Save your changes, and done! You have successfully changed the anchor point.

Creativity Tip: Incorporating Anchor Point Animation

Now that you are familiar with the process of moving the anchor point, let’s have a look at some innovative applications of anchor point motion that you may utilize in your projects. You are not need to maintain the anchor point still throughout the entirety of the motion; rather, you are free to move it in order to create captivating effects.

Topic 1: The Illusion of Pivoting

Through the use of animation on the anchor point, you may provide the impression that a character is rotating around a fixed point. This technique is fantastic for developing engaging animations of characters, and it also has the potential to infuse your drawings with a bit more vitality. Imagine, for instance, a swinging pendulum or a bouncing ball, both of which have an anchor point that shifts subtly but noticeably so that the movement appears to be more natural.

Topic 2: Unconventional Transitions

Try moving the anchor point when going from one scene or part to another. By moving the anchor point smoothly, you can make unexpected changes that will keep your audience’s attention. Try combining this method with the “How to Create a Wipe Transition in After Effects” lesson for even better results.

Conclusion:

Congratulations! You now know everything you need to know about how to move the anchor point in After Effects. This simple but powerful method will definitely make your motion graphics projects better and give you a lot of creative freedom. Don’t forget to read our other blog posts about Snail Motion, like “How to Add Adjustment Layer in After Effects” and “How to Make Precomp in After Effects” which will help you build on what you’ve learned here. Explore the “Animate Objects like a Pro with Motion Tools” blog post and free AE tool to take your animations to the next level.

With practice and a little bit of creativity, you’ll be well on your way to learning After Effects and making stunning motion graphics that will leave your audience in awe. Happy creating!

How to Add adjustment layer in after effects by snail motion

How to Add adjustment layer in after effects

Hello, fellows! Welcome back to Snail Motion, your go-to spot for all things related to video editing and motion graphics. Today, we’ll go over an important part of Adobe After Effects: How to Add adjustment layer in after effects. This powerful tool can greatly improve your post-production process by letting you apply effects and corrections to multiple layers at once. So, let’s not waste any time and learn how to master the art of adjustment levels! Make sure also learn about How to make Precomp in After Effects.

What is an Adjustment Layer?

In After Effects, an adjustment layer is a transparent layer that sits on top of your design and does not change it. An adjustment layer is different from regular layers because it is a control panel for adding effects and changes to multiple layers at once. It works like a virtual filter through which the content of other layers can pass. This makes it a useful and flexible tool for editing videos.

Step-by-Step Guide to Adding an Adjustment Layer:

Step 1: Create a New Composition

Before we add an adjustment layer, let’s start by making a new project arrangement. Click “Composition” in the After Effects menu and choose “New Composition.” Type in the choices you want for your composition, like resolution, frame rate, and length, then click “OK.”

Step 2: Import Footage

Let’s get started by importing the footage or assets that you want to use in this project. Simply navigate to the “File” menu, then to the “Import” menu, and pick the media files that you want to incorporate in your composition at that point. Simply beginning to work with these files requires you to drag and drop them into the timeline.

Step 3: Add Adjustment Layer

You can add an adjustment layer by going to the “Layer” menu and selecting “New” followed by “Adjustment Layer.” You also have the option to adjust the layer by right-clicking on the timeline panel, selecting “New,” and then selecting “Adjustment Layer.”

How to Add adjustment layer in after effects by snail motion

Step 4: Position the Adjustment Layer

The adjustment layer will show up in your timeline as a new solid layer when it has been added. It will have the same dimensions as your composition if you don’t change the default settings. Because the adjustment layer must be on the highest layer in order for it to have an effect on the layers below it, you will need to drag and drop it to the very top of the layer stack.

Step 5: Apply Effects and Adjustments

Now we get to the enjoyable part! Once you have the adjustment layer chosen, head over to the “Effect Controls” tab in After Effects so that you may investigate the plethora of effects and modifications that are at your disposal. Applying effects to the adjustment layer will cause those effects to be applied to all of the layers below it. These effects may include colour correction, filtering, or any other visual enhancement.

Example: Enhancing Color Grading with Adjustment Layers

Let’s imagine that we have a piece that consists of a variety of video clips, and that we want to apply a colour grading effect that is uniform across the board for all of them. If we want to create the same effect in the most time-efficient manner, we can utilise an adjustment layer rather than manually modifying each video layer in turn.

  1. Begin by importing your video clips into a new composition that you have just created.
  2. In the topmost position in the layer stack, add an adjustment layer.
  3. Make sure the adjustment layer is selected, and then head over to the “Effect Controls” panel.
  4. Use the colour grading effect that you want, such as “Tint,” “Curves,” or “Colour Balance.”
  5. Adjusting the settings of the effect will help you obtain the look you want.
How to Add adjustment layer in after effects by snail motion

In a few simple steps, your adjustment layer will apply the colour grading effect to any video clips below it, giving your production a professional and accurate look.

Conclusion:

Congratulations! You are now an expert at applying an adjustment layer in After Effects thanks to your hard work. Your proficiency in video editing will unquestionably improve thanks to the implementation of this vital approach, which will also help you save significant time during the post-production process. Try out a wide range of effects and modifications, and let your imagination run wild as you construct jaw-dropping visual experiences for your audience.

Keep an eye on this site, as we will be posting additional helpful instructions and hints in the near future. Keep on producing and coming up with new ideas until we meet again!

Best wishes as you edit! 🎥🐌

How to make Precomp in After Effects by snail motion

How to make Precomp in After Effects

Welcome back to Snail Motion, your go-to place for motion graphics and video editing! Today, we’ll look at How to make Precomp in After Effects, which are one of the most important parts of Adobe After Effects. You’ve come to the right place if you’ve ever thought about how to better organize your compositions, streamline your workflow, and handle complex projects in an effective way. In this lesson, we’ll show you how to make precomp after effects and how they can improve your animation projects in amazing ways.

Understanding Precomp After Effects: A Brief Overview

Before we get into the details, let’s take a quick look at What is Precomposing in after effects and why they are important. Precomps, short for “pre-compositions,” are a way to combine multiple levels into a single composition in After Effects. By doing this, you can treat the precomp as a single layer in the main composition. This makes the general structure simpler and makes it easier to handle complex animations.

Step-by-Step Guide to Creating Precomps

Select Your Layers:

Open the project you want to work on in After Effects and find the layers you want to group together. You can pick multiple layers by holding down the Shift key, or you can use Ctrl/Cmd + Click to select a single layer.

Right-Click and Choose “Pre-compose”:

Once you’ve chosen the layers you want, right-click on one of the layers you’ve chosen. Choose “Pre-compose” from the menu that pops up. You can also go to the “Layer” menu at the top and choose “Pre-compose” from there.

How to make Precomp in After Effects by snail motion

Name Your Precomp:

After you click “Pre-compose,” a box will pop up asking you what you want to call your precomp. Choose a name that describes the content of the layers you’re putting together. Check the “Move all attributes into the new composition” box to keep all of the layers’ effects, keyframes, and other changes.

2

Set Precomp Duration and Size (Optional):

If you need to, you can change the length and size of your precomp in the dialogue box. By default, the settings of the chosen layers will be used to set up the precomp.

Click “OK”:

After giving your precomp a name and making any changes, click “OK.” After Effects will make a new composition with the levels you chose.

The Power of Precomps: Simplify and Streamline Your Workflow

Now that you’ve created your precomp, let’s explore how it can benefit your workflow:

Organization:

Your main piece of writing will be neat and well-organized if you use precomps. You can work with a few precomps instead of a lot of individual layers, which makes it easy to move around and make changes.

Isolation of Complex Elements:

When working on complex animations with many moving parts, precomps let you focus on certain parts without thinking about how they might affect other parts of the project.

Nested Precomps:

Organise things even more by putting precomps inside of other precomps. This format helps break up complicated animations into parts that are easier to work with.

How to make Precomp in After Effects by snail motion

Time-Saving:

Precomps can be used in more than one project, which saves you time and effort when making animation routines that are similar.


Conclusion:

ongratulations! You now know how to make precomps in After Effects like a pro. With these powerful tools, you can streamline your workflow, handle complicated animations easily, and keep your project structure well-organized. By using precomps, you’ll be able to work more freely and quickly, and your motion graphics projects will look more professional as a result.

At Snail Motion, we want to help you improve your motion graphics skills by giving you useful tips and tricks. Stay tuned for more Adobe After Effects lessons and tips to help you get the most out of it. Happy creating!

How to time remap in after effects by snail motion

How to time remap in after effects

In the fields of video editing and motion graphics, one of the most effective and popular programs of software is called After Effects. Time Remapping is one of its major capabilities, and it gives users the ability to adjust the speed and time of their footage, which enables them to create breathtaking visual effects and compelling narratives. In this article, we will guide you through the Time Remapping process in After Effects, providing instructions that are easy to follow step-by-step as well as helpful hints on how to become an expert in this method. Therefore, let’s get started and see what Time Remap has in store for us!

What is Time Remapping?

Changing the speed of a video clip over time is called “time remapping.” It lets you make different effects, like slow motion, fast motion, freeze frames, and even backward motion. By changing the timing of your film, you can add drama, draw attention to certain parts, or make visually interesting sequences.

How to time remap in after effects by snail motion

Step-by-Step Guide

Import Footage:

Start After Effects and bring in the video clip you want to use. To do this, click File > Import > File or press Ctrl + I (Cmd + I on a Mac) on your keyboard.

Create Composition:

Simply by dragging the imported video into the Composition panel, you may quickly generate a new composition that uses the same parameters as your video clip.

Enable Time Remapping:

Choose Layer > Time > Enable Time Remapping from the menu after selecting the video layer in the Timeline panel. This will enable time remapping. The layer receives a new property with the name “Time Remap” when this action is performed.

Setting Keyframes:

You can start the time remap process by moving the current time indication to the place where you wish it to begin. To set the first keyframe, click the stopwatch icon that is located next to the “Time Remap” heading. You will need to specify another keyframe when you have moved to the location where you want the time remap to terminate.

Adjusting Speed:

Move the keyframes horizontally to adjust the speed at which the animation transitions from one keyframe to the next. Smooth speed ramps can be created by adjusting the value of a keyframe in either direction.

Time Stretching:

If you want to create the effect of a frozen frame, put a keyframe at the frame that you want to freeze, and then leave the next keyframe at the same time position.

Reverse Motion:

Putting a keyframe at the very end of the movie and then adding another keyframe at the very beginning will produce the effect of the film moving backwards. Move the second keyframe to the left of the first keyframe using the dragging handle.

Smooth Transitions:

Right-click on a keyframe and choose “Keyframe Interpolation” to make the changes between keyframes easier. Change the type of interpolation to “Bezier” to make shapes that are smooth.

Speed Ramping:

To make speed ramps, add multiple keyframes and move them around to better control how fast the speed changes.

Preview Your Work:

To see how your Time Remap effects look in real-time, you can either press the spacebar or use the RAM preview. If you choose to use the RAM preview, simply press the number 0 on the numeric keypad.

Conclusion:

Time Remapping in After Effects gives you creative freedom to modify time and enhance your videos. Time Remapping lets you create slow-motion or fast-paced sequences.

Practice makes perfect, so try different keyframe speeds and positions to acquire the appearance you want. If you work hard and think outside the box, Time Remapping in After Effects can provide stunning effects.

Now it’s time to put what you’ve learned to use and use Time Remapping to make engaging visual stories!

How to Create Wipe Transition in After Effects by snail motion

How to Create Wipe Transition in After Effects

After Effects is a strong and flexible tool for making motion graphics and editing videos. One of the most popular and visually pleasing effects it has is called “Wipe Transition.” Wipe transitions are an easy way to make a smooth change from one scene or element to another in your videos. In this lesson, we’ll show you how to make a wipe transition in After Effects step by step.

Good News: We have a free pack of transition, Download Now.

Step 1: Launch After Effects and Import Footage

First, make sure your machine has Adobe After Effects installed. Start the program and make a new composition by clicking “Composition” in the top menu and then “New Composition.” Name your piece and choose the settings you want for your project.

Next, bring in the video or other parts you want to use for your wipe transition. To do this, click “File” in the top menu, then choose “Import” and choose the files you want to use.

Step 2: Create a Solid Layer

Right-click on the timeline and choose “New” > “Solid.” You’ll see a box that lets you choose the color and size of the uniform layer. For wipe transitions, the best color to use is one that stands out from the tape. This makes it easier to see the change. For example, if most of your material is dark, choose a bright color for the solid layer, like white or yellow. Click “OK” to make the layer solid.

Step 3: Position the Solid Layer

Move the solid layer to the top of the layer stack in the timeline, above the video or other part you want to transition from. Make sure the start point of the solid layer lines up with where you want the shift to start.

Step 5: Set Keyframes

Move the playhead to where you want the wipe transition to start at the beginning of the piece. To set the first keyframe for the solid layer position, click the stopwatch button next to “Mask Path” in the settings for the solid layer in the timeline.

Step 4: Apply Mask to the Solid Layer

Click on the “Rectangle” tool in the toolbar while the solid layer is chosen to make a rectangle mask on the solid layer. Draw the mask over the area where you want the wipe to start. This area will be where the change will start.

Step 6: Animate the Wipe Transition

Now, move the playhead to where you want the wipe transition to end in the timeline. Change the position of the mask to slowly show more of the video or element underneath. As you change the mask, After Effects will make a new keyframe for you immediately.

Step 7: Customize the Wipe Transition

To change the wipe transition even more, move the keyframes closer or farther apart to change the speed of the animation. Try out different mask shapes (such as ellipse or polygon masks) and feathering choices to make wipe transitions that are unique and look good.

Step 8: Preview and Export Wipe Transition

Once you’re happy with how the wipe change looks, it’s time to see what the end result will look like. In the After Effects composition window, use the playhead to look at the transformation. If everything looks good, you can export your movie by going to the top menu and clicking on “Composition” and then “Add to Render Queue.” Select the settings you want for the final video and click “Render” to make the final video with the wipe transition.

Conclusion:

Using a solid layer to make a wipe transition in After Effects is a simple but powerful way to make your video projects look better. By following the steps in this guide, you can make your videos look more professional and keep your audience’s attention with smooth, eye-catching transitions. So, try out different mask shapes and animation styles to make interesting wipe changes that help your video tell a better story. Happy editing!

Animate Objects like a pro With Motion Tool | Free AE Plugin

Animate Objects like a pro With Motion Tools | Free AE Plugin 2023

As the world of animation continues to change, artists and designers are looking for tools that can make their work easier and bring their creative ideas to life. Motion Design School’s Motion Tools script is one such tool that has been making waves in the animation community. This powerful and free After Effects plugin was made to change the way things are animated. It has a variety of features that save time and effort for both beginners and experienced animators. In this blog post, we’ll talk about what Motion Tools can do, how to download and run it, and all the amazing benefits it offers.

Understanding Motion Tools:

Motion Tools is a great script made by Motion Design School, which is well-known for its creative ways of teaching animation. This tool was made to make the process of animation easy and to help artists around the world be more creative. Motion Tools gives artists a set of smart features that save time and let them focus on their art instead of trying to figure out complicated technical details.

Easy Downloading and Installation:

Before Installation, first we need to download this. Latest Version
If you are unable to download the latest version, then try this. Older Version
Motion Tools is one of the best things because it is easy to use. Students at Motion Design School get it for free, so they can use its strength without paying any extra money. Users can quickly add the tool to their After Effects setup because it is easy to install. This gives their animation projects a lot more options.

Scripts with dockable/embeddable UI’s are installed in the ScriptUI Panels folder and run from the Window menu in After Effects. Most scripts on this site have dockable panels.

Scripts without a UI are installed in the Scripts folder and run from the File->Scripts menu.
macOS:
/Applications/Adobe After Effects (version)/Scripts/ScriptUI Panels
Windows:
C:\Program Files\Adobe\Adobe After Effects (version)\Support Files\Scripts\ScriptUI Panels

Revolutionizing Object Animation:

Motion Tools is great at making it easier to animate objects. It has a lot of tools that make animating objects like a pro easy. With its easy-to-use interface, users can easily move and change keyframes, easing curves, and animation lines to make motion graphics that look smooth and professional. Motion Tools gives you the tools you need to bring simple icons or complicated figures to life with finesse.

Smart Keyframe Management:

Managing keyframes can take a lot of time, especially when animating something complicated. But Motion Tools makes this process much easier in a big way. The script studies the animation and optimizes the keyframes, making the animation less cluttered and more efficient. This tool not only saves time but also makes project files cleaner, which makes it easy to work with other artists.

Real-time Preview:

In animation, being able to see how changes will look in real-time is very helpful. Motion Tools does just that, letting artists see their work right away and make any changes they need on the spot. Through this iterative process, artists can fine-tune their animations until they are perfect, which leads to great final goods.

Conclusion:

Motion Design School has given the animation community an amazing plugin called Motion Tools, which makes object animation easier, improves efficiency, and encourages artistic expression. Whether you’re a student, an experienced artist, or just starting out, this free AE plugin is an essential part of your toolkit. Use Motion Tools to its full potential and your drawing skills will reach new heights.

If you want to see how great Motion Tools is for yourself, you can download it and learn more about it on the Motion Design School website: [Link: https://motiondesign.school/products/motion-tools/]. Happy animating!